AWS Deployment Guide
This guide details the steps required to deploy the cvhome platform to AWS. The process has been simplified using a CloudFormation "Launch Stack" button which sets up the necessary CodeBuild pipelines for building, deploying, and destroying the infrastructure.
Prerequisites
Before starting the deployment, ensure you have the following:
- AWS Account: Access to an AWS account with sufficient permissions.
- Domain Registered in Route 53: A hosted zone for your domain must exist in Route 53.
- GitHub Account: Your GitHub account where the
cvhomerepositories will be accessed. - Stripe Account (Optional): If you intend to use subscription/billing features, have your Stripe API key ready.
Deployment Steps
Follow these steps to deploy the application:
Step 1: Launch the Bootstrap Stack
The deployment starts with the cvhome-bootstrap repository.
Launch Stack: Go to the
cvhome-bootstraprepository's README and click on the "Launch Stack" button. This will take you to the AWS CloudFormation console.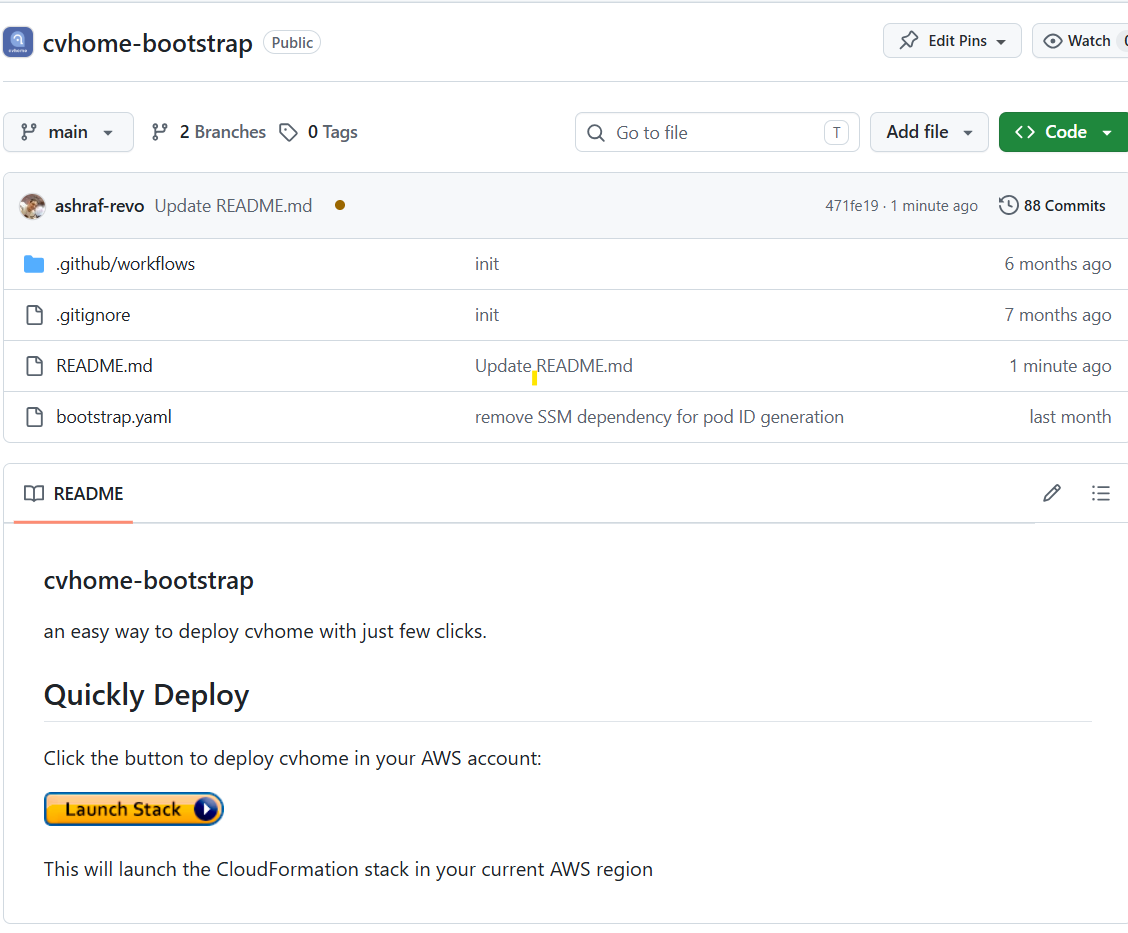
Fill Parameters: Provide the following information in the CloudFormation "Create stack" wizard:
- DomainZoneId: Select the Route53 hosted zone for your application.
- PodCount: Number of pods to create (0-20, default: 0).
- PodSize: Size of the pod (
small,medium,large, orx-large). - PodAutoScale: Enable or disable pod auto scaling (
true/false). - isProd: Set to
truefor Production orfalsefor Dev environment. - isMonitoring: Enable or disable monitoring (
true/false). - allowTestStores: Allow test stores (
true/false). - GithubAccount: Your GitHub account name for deployments.
- Branch: The branch to deploy (default:
main). - StripeKey (Optional): Your Stripe API key.
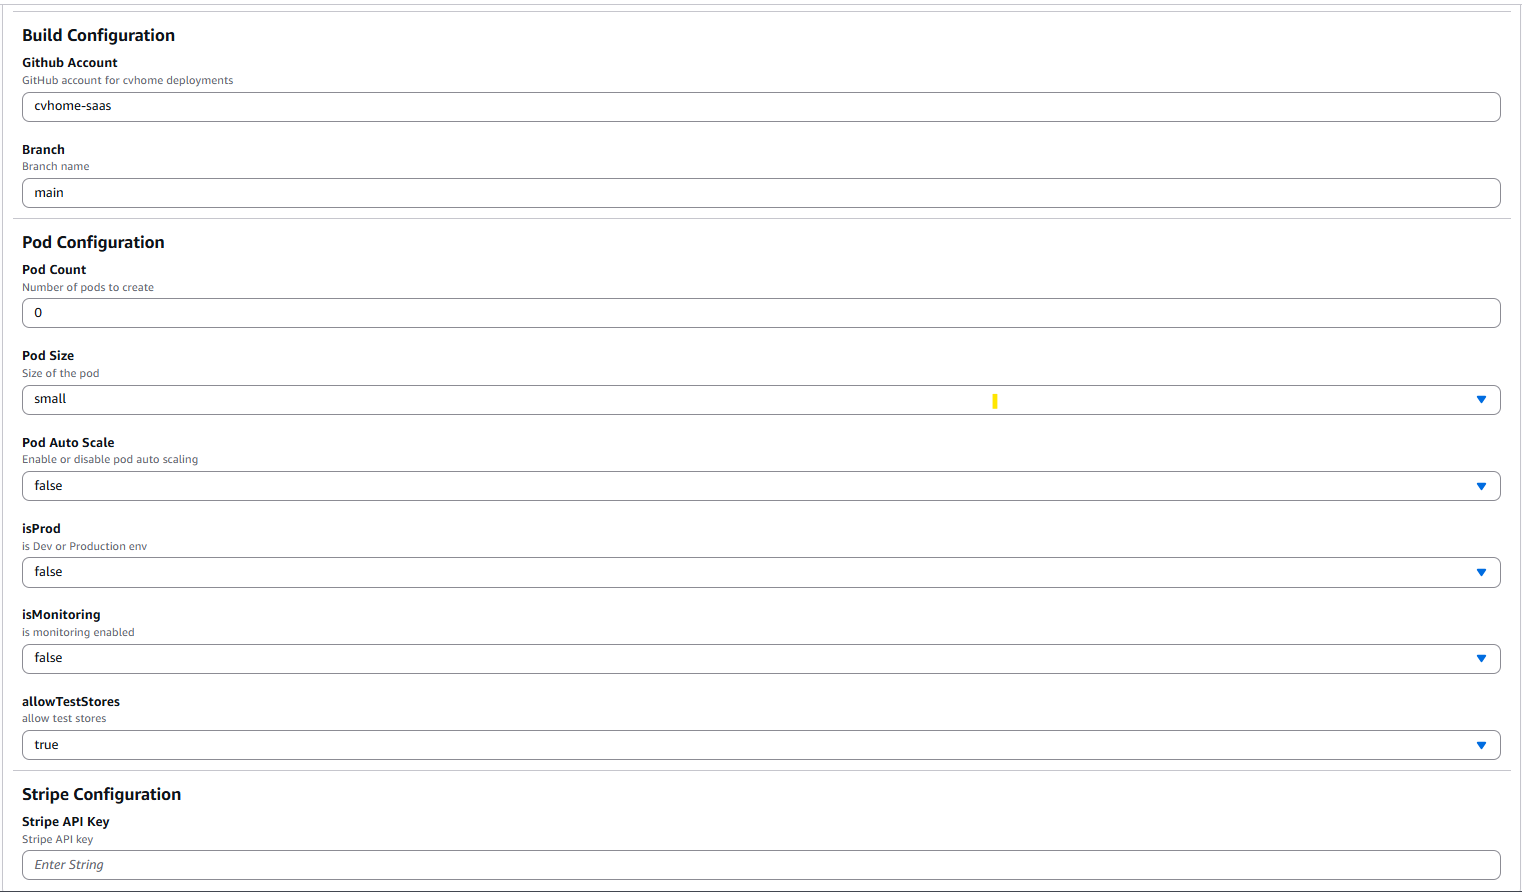
Create Stack: Complete the wizard and wait for the CloudFormation stack to be created. This stack sets up three CodeBuild pipelines.
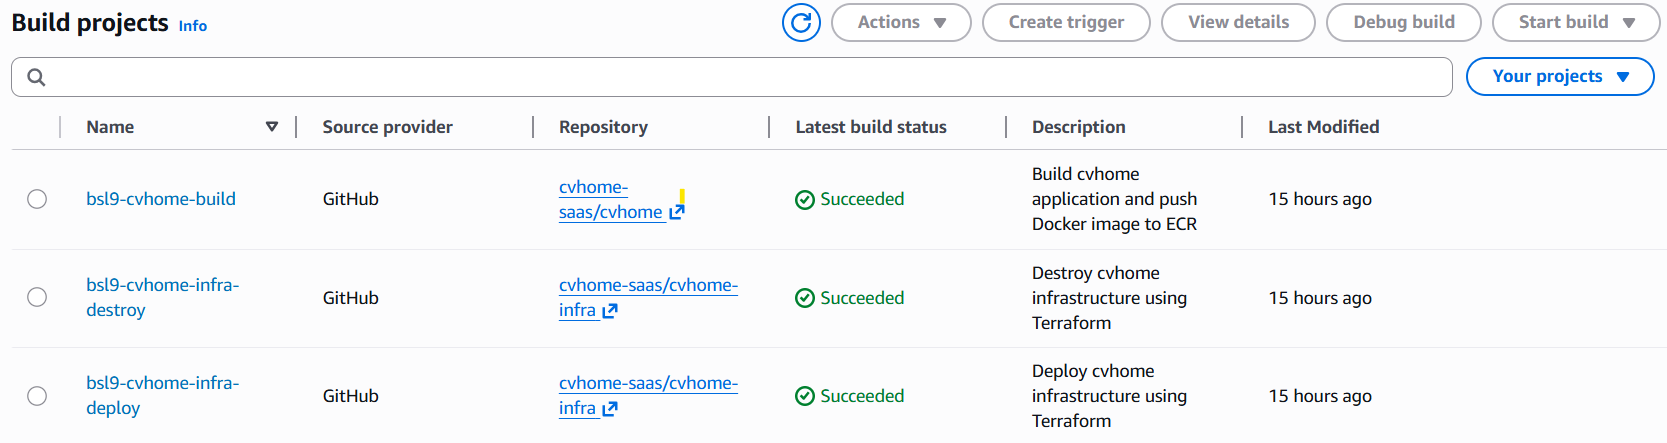
Step 2: Build and Push Images (cvhome-build)
Once the bootstrap stack is ready, you need to build the application images.
Navigate to CodeBuild: Go to the AWS CodeBuild console.
Start Build: Find the project named
cvhome-buildand click "Start build".Monitor: This pipeline builds the Docker images and pushes them to the Amazon Elastic Container Registry (ECR). Wait for it to complete successfully.
Step 3: Deploy Infrastructure (cvhome-deploy)
After the images are pushed, you can deploy the main infrastructure.
Start Deploy: In the AWS CodeBuild console, find the project named
cvhome-deploy.Trigger Apply: Click "Start build". This pipeline triggers a
terraform applyto provision the VPC, ECS clusters, RDS, and other resources.Wait for Completion: This is the longest step and may take 15-30 minutes.

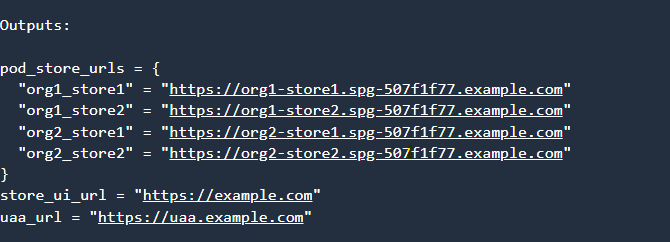
Accessing the Application
After cvhome-deploy finishes successfully:
- Check the logs of the
cvhome-deploybuild. - Look for the Terraform Outputs section to find the URLs for your deployed application.